Our last blog post on styling casual gallery walls had us excited to share more tips. This time we want to give you some strategies for creating more complex gallery walls. We will be using more elements in this example and showing you how to streamline your installation.
With Patti in the midst of a renovation on her Whistler condo, we thought that it might be a nice time to feature her latest interior design project as well. Patti and Rick want to incorporate some of Patti’s photographs into the project so a gallery wall seemed like a great way to do it. In this post we will show you how we design the wall but you will have to stay tuned to see the finished product installed later in August.
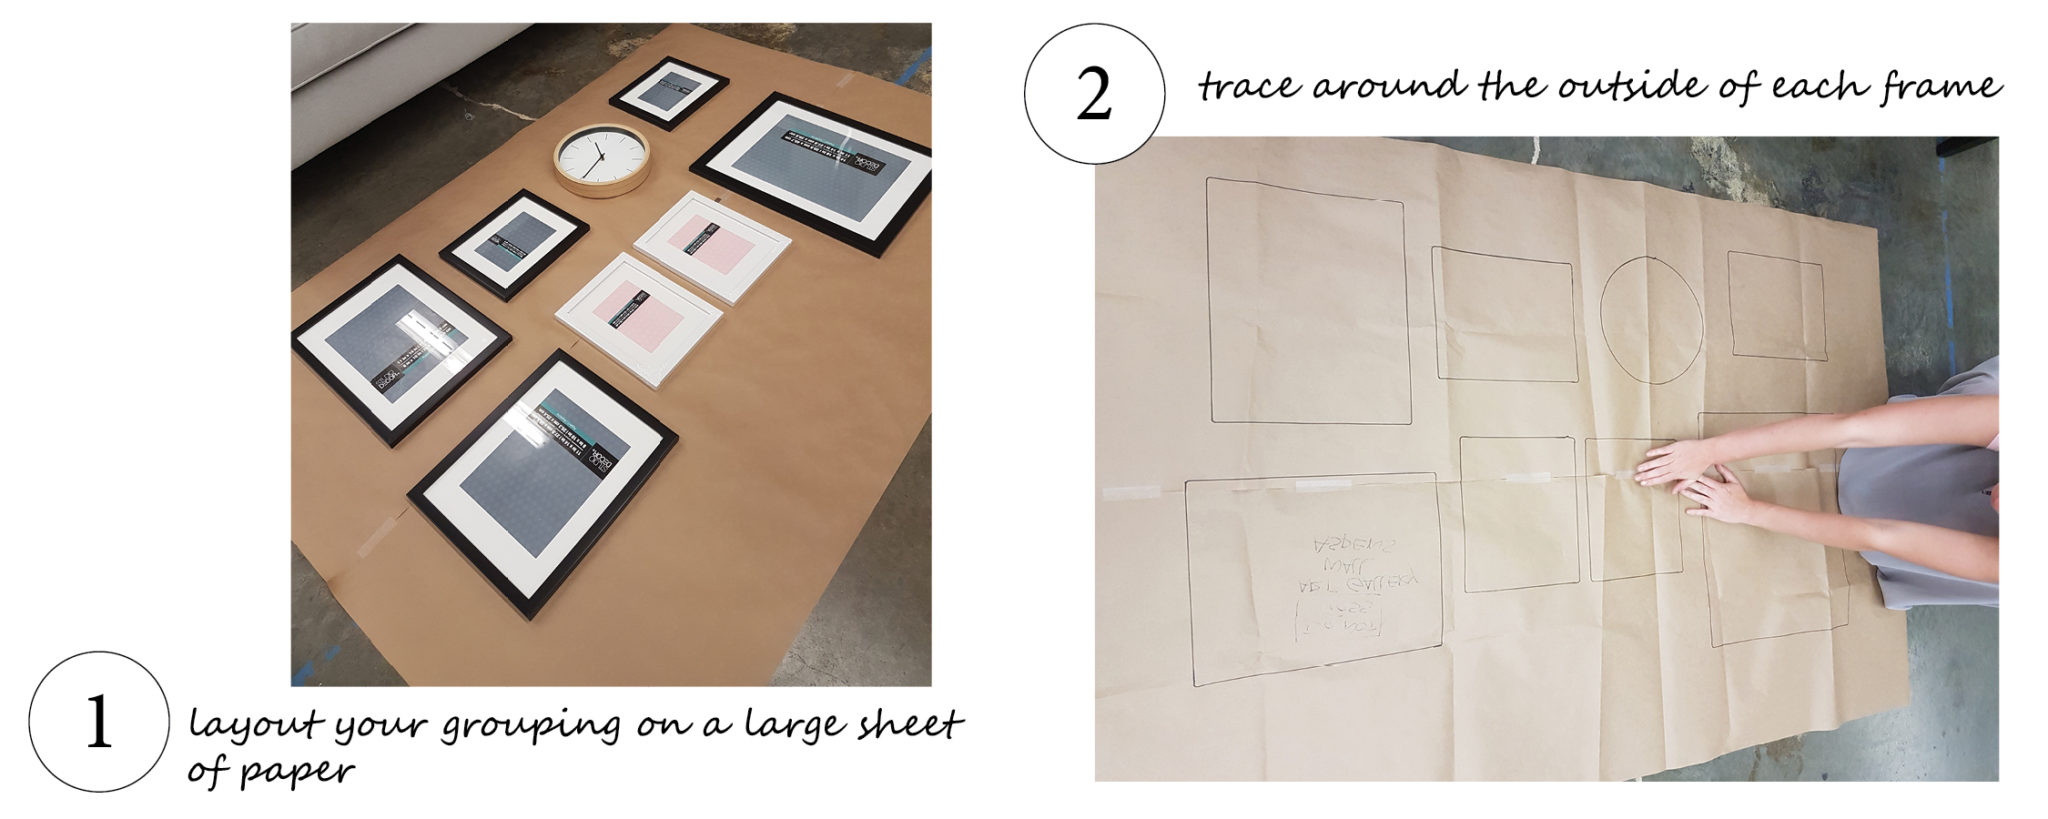
Laying out Your Frames
We think it’s easiest to buy and layout your frames and then order the prints. Starting with a mix of pre printed and framed images makes it much harder to create a cohesive look.
Choosing Images and Ordering Prints
If you have a chance to look at your prints together before you order them you will find it easier come installation time. We know that not everyone has the software to map out a gallery wall but luckily there is an app for everything! For android try Wall Photo Frame Editor and for Apple users use Try On Wall from Artfully Walls.
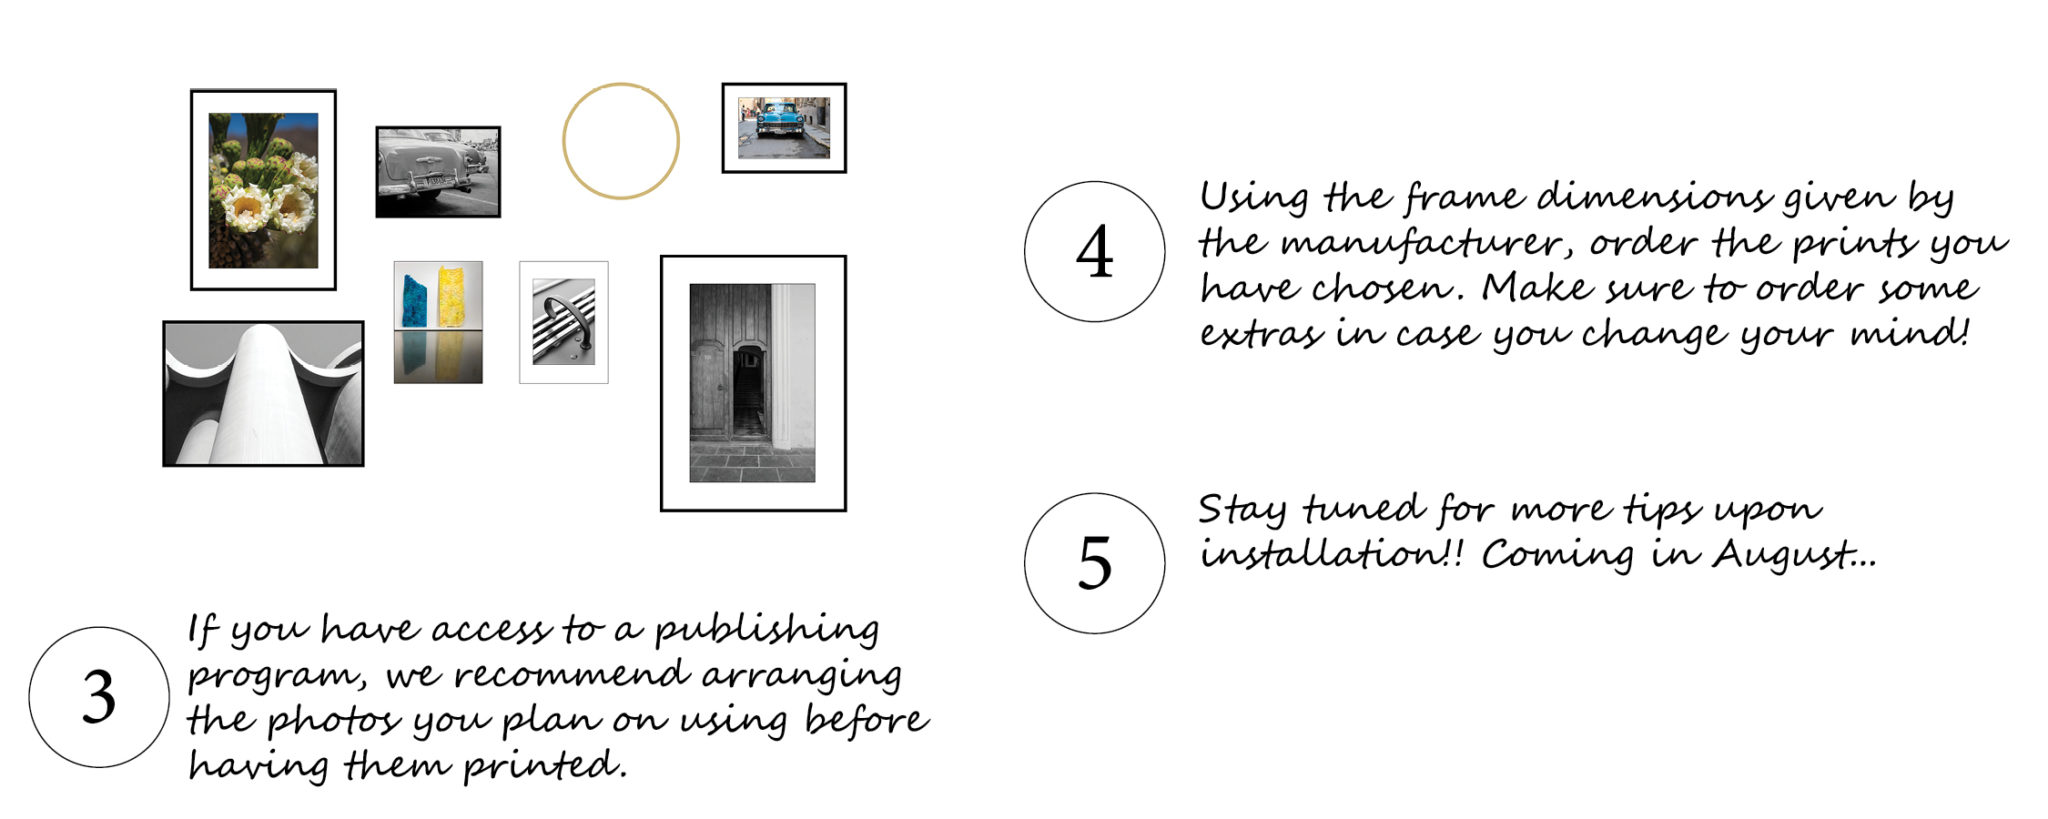
Have fun playing with your arrangement. You can use our tips from our post on Creating a Casual Gallery Wall for some strategies for choosing your images. We like using some matted and some non-matted images. We also choose mostly black and white images with a whisper of colour. Make sure that the colours all complimented one another.
Installation
Stay tuned in August for the reveal and more tips about installing your custom gallery wall.
~The Flüffians
")
")


Add a comment
0 Comments